How to Use Backing Tracks for Gigs: Gear Setup and Guide
The first thing you need to know is that you don't need to go out and buy a dedicated, expensive backing track player. You can run your entire show playing your tracks and scrolling your lyrics using gear you likely already own, like a tablet or a laptop.
I have used a Lenovo M8 Gen 4 which cost only £90 and audioCue for gigs and it ran just as well as my Windows Surface which cost £800.
Tutorial: How to Sync Lyrics to your Backing Tracks in One Pass
The biggest hurdle for most musicians is the time it takes to get lyrics synced to their tracks.
In this video, I show you how to do it in one single pass using audioCue, so you aren't spending your life sitting in front of a computer before a gig.
Download audioCue free now to follow along on your device.
Works On:
The Essential Kit for Your First Gig
To get your sound from your device out to the people in the pub, this is the basic gear I use every time I play:
- Tablet (Android, iOS, or Windows Surface): This is your workstation. It holds your tracks and displays your lyrics.
- Audio Mixer (I use a Behringer X1222USB): This is where you plug in your mic, your instrument, and your tracks. It lets you balance the volumes so you don't drown yourself out.
- Microphone (I use a Shure SM58): The industry standard. It’s tough, reliable, and sounds good in any room.
- Active Speakers (I use 2 x Behringer B120d): These have the amplifiers built-in, so you just plug them into the mixer and the wall.
- Cables: You'll need XLR cables for your mic and speakers, and the right leads to connect your tablet to the mixer. I always use Roland Black Cables. It is always best to have too many cables!
Plugging In and Powering Up
Before you even touch a volume knob, you need to get your stage set up safely and in the right order.
This isn't just about the sound; it’s about making sure you don't damage your gear or trip over your own feet.
The Set-Up Order
- Stands First: Get your speaker stands and mic stand up and locked in place.
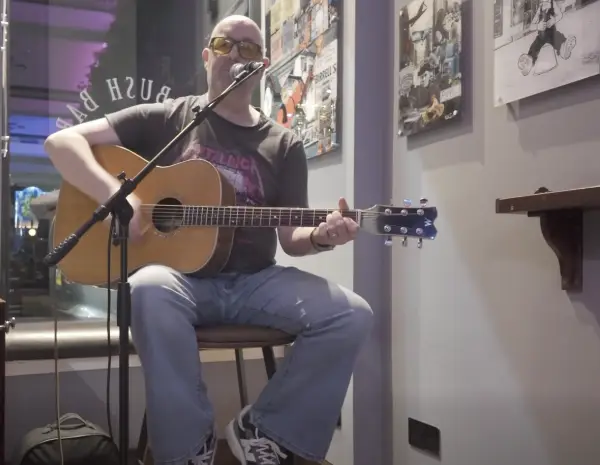
- Speakers and Mic: Set these up to suit the area. They take up most room so getting this right is going to determine how you move around while playing. I like to give my self around a meter and a half each side of me for my speakers and have them pretty much lined up with me facing the crowd. You can see in my photo above, I have my mic set up on a boom as I have my guitar pedal board on the floor which also takes up some room.
- Cable Runs: Connect your speakers and mic to the mixer. Keep your speaker cables behind you so they are out of the way and not a trip hazard. I recommend always clipping the mic cable to the stand. It saves it from flapping around and looking untidy.
- The Tablet: Connect your tablet to the mixer, either via your Bluetooth receiver or your backup cable.
The Power-On Rule (Avoid the "Pop")
Always turn your gear on in this specific order: Tablet first, then the Mixer, then the Speakers last.
If you turn the mixer on after the speakers, you’ll get a huge "pop" sound that can actually damage your speaker drivers. When you pack down at the end of the night, do the exact opposite: Speakers off first.
Stage Layout and Safety
- Keep it Tidy: Untidy cables don't just look messy; they are a major trip hazard. Use clips or Velcro ties to keep your mic cable tight to the stand.
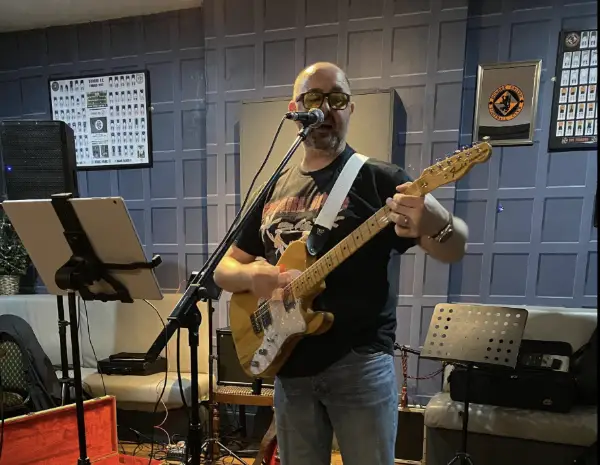
- Guitar Placement: If you play guitar, keep your stand behind you so you don't knock it over.
- Mixer Positioning: If you are a right-handed guitarist, keep the mixer to your right. This allows you to tweak your levels with your strumming hand while still holding a chord with your left.
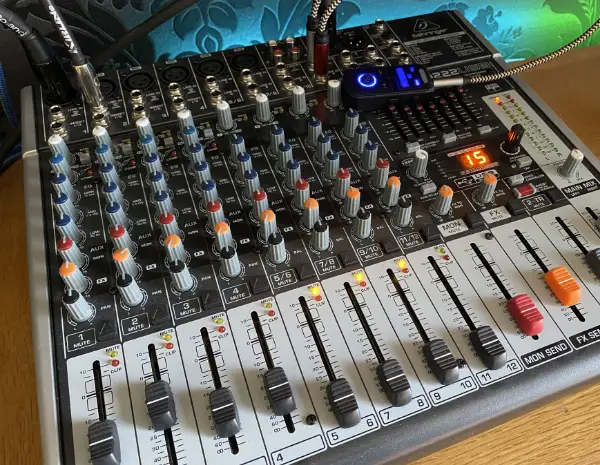
Setting Up the Mixer
The mixer is where your microphone, instrument, and backing tracks all meet. It looks complicated, but for a solo or duo gig, you only really use a few channels.
What I Connect to My Behringer X1222USB:
- Channel 1 (Mic): This is for my Shure SM58. I keep the "Gain" set so my voice is clear without hitting the red lights on the meter.
- Channel 2 (Guitar): I normally plug my guitar from my pedal board directly to channel two. On my mixer there is a Line button which I use to take 10db of top end of the volume. My pedal board has a Cabinet Simulator so I can get the sound of a real guitar cabinet withoug having to pug around my big amplifier!
- Channel 11/12 (Backing Tracks): This is where I plug in the tablet. I use a stereo channel so the music sounds full and balanced. I have my Bluetooth Receiver plugged in here, but this is optional. You can just use a 3.5mm to dual mono 6.35mm cable.
- Main Out (Speakers): Two XLR cables run from here directly to my active speakers.
Pro Tip: Start off by pulling your master volume right to 0, play your backing track, and bring track volume up to Unity (this is marked as 0 on the mixer slider) then gradually up the master volume until it sounds as loud as you like. Then do a short vocal test over the mic gradually upping the mic volume until it sounds right. Just saying "1, 2, 1, 2" won't give you a real feel for the mix; it is better to sing a little bit of a song to get a good feel for the overall sound. You can then tweak your sound for the room as the gig progresses.
How to Perform with Backing Tracks
Having the gear is only half the battle. To use backing tracks effectively at a live gig, you need a workflow that lets you engage with the crowd instead of staring at a screen.
1. Organize Your Setlist
Don't hunt for tracks between songs. Use audioCue to build my setlist before I leave the house.
This means when one song ends, the next one is ready to go instantly. Silence between songs kills the energy in a pub.
2. The "Count-In" Secret
When you use backing tracks, you can't "feel" when the drummer starts. I ensure all my tracks have a 4-beat click count-in. This gives me time to get my hands on the guitar and my mouth to the mic so I hit the first note perfectly every time.
3. Scrolling Lyrics vs. Static Text
If you're reading a static PDF, you have to manually swipe the screen while playing guitar. This looks unprofessional. I use the time synced lyrics in audioCue so the lyrics move at the exact pace of the backing tracks. It stays in my peripheral vision so I can keep eye contact with the audience.
4. Volume Control on the Fly
Every room is different. Once the pub fills up with people, the sound will change - I keep my mixer to my right hand side so I can slightly nudge the backing track volume or my vocal gain mid-song without stopping the performance.
Your Gig-Day Checklist
Before you load the car and head to the pub, run through this final list. There is nothing worse than forgetting that 1 cable you MUST have.
- Power leads: Do you have enough for the speakers, mixer, and tablet charger?
- Spares: Always carry a few extra XLR and a couple of extra 1/4 inch jack cables.
- The "Offline" Check: Is your setlist downloaded for offline use in audioCue? Don't rely on pub Wi-Fi.
- Battery: Is your Bluetooth receiver (if using one) fully charged?
Ready to hit the stage?
You have the gear and the guide. Now you just need the software that stays out of your way so you can perform.
Download audioCue free now to follow along on your device.
Works On: